December 28, 2008

Chestnut, Vanilla & Rum Melktert


Looking through my collection of custard tart recipes I found this traditional South African recipe and adapted it by adding the last of my dried local chestnuts and soaking them in rum, to celebrate the end of the harvest season, and to kick-start the holiday season. This tart is deliciously creamy and ideal for the festive, cold winter months.

The generous covering of cinnamon sugar on the top combined with the boozy richness of a bottom layer of halved, rum-soaked chestnuts, and the filling of vanilla-infused custard makes a tart that should get a first-place vote from every family member (if the varied tastes of my family are anything to go by!). Made with a gluten-free crust which holds up fantastically when cut, and lasts for up to 1 week in the fridge, this recipe will endure the festive week around Christmas when other favourite goodies compete for a place on the dessert plates.

Note 1: the filling will fill a 22 cm (9") spring-form tin as well as a little cake tin on the side (nice for sampling before tucking in to the actual tart!
Note 2: Leave a good 2 hours for the creation of this dessert; it is well worth the care and attention.

5 tbsps rum
400ml Double cream
1/2 of 1 vanilla pod, split lengthways
50g unsalted butter
4 eggs, separated
100g granulated sugar
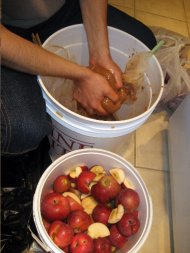
Chestnuts: 2 small handfulls of pre-boiled and peeled chestnuts
2 tbsps of gluten free flour mixture (10ml each of potato starch, tapioca starch and white rice flour)
2 tbsps of cornstarch / cornflour
2 tsp cinnamon
75g brown sugar with no lumps


To allow for maximum rum absorption, break the chestnuts into halves and place in a shallow container that can just barely contain the chestnuts in 1 shallow layer and spoon over 3 tablespoons of rum. Leave to soak until their use at the very end of the recipe.


For the Gluten free Pastry:
1 egg
75g unsalted butter at room temperature
75g icing sugar

In a food processor combine the cubed butter, icing sugar and egg. In a bowl stir the flours together with the xanthan gum and add to the butter mixture.
75g tapioca starch
50g potato starch
125g white rice flour
1/2 tsp xanthan gum

Pulse until the pastry forms a ball. Flatten the dough into a disc and wrap in plastic wrap to chill in the fridge for at least 30 minutes. This can be made ahead of time and left in the fridge until required.

Place the disc of dough between two pieces of plastic wrap and roll out. The dough may be resistant to stretching but keep rolling until you reach a thickness of roughly an 1/8th of an inch. Drape the dough over a 20-22cm spring-form/loose-bottomed cake tin. You may have to patch the dough a little around the sides and top edges but rest assured it will look great in the end. You can even leave the top edge looking uneven which adds to the character -making it a little more rustic looking; just be sure to keep the sides quite high- you want the dough coming up to at least 2cm from the top of the springform tin. Prick the base with a fork and chill for 15 minutes. Preheat the oven to 190°C.

While the pastry is chilling put the cream in a pan with the butter and half the vanilla pod. Bring to a boil, then quickly remove from the heat, and leave the mixture to infuse.

Remove the pastry from the fridge and prepare to weight the pastry for baking. Cut enough parchment paper so that it will cover the base of the pastry and so that it can be filled with baking beans (I use rice grains which is often a cheaper option than buying baking beans). Try to evenly distribute the weight so that it reaches the outer edges of the pastry base to prevent rising.

Bake the pastry for 10 minutes and remove paper and baking beans/rice. If the fork marks reveal the tin base then brush the pastry with a beaten egg to help seal it. If given the egg-wash treatment then return the pastry to the oven for a further 10 minutes.

While the pastry is baking whisk together the egg yolks and the sugar, then whisk in the flour mixture and the cornstarch. Sieve the heated cream into the egg yolks and stir, then return mixture to the pan to cook on a low heat for several minutes, stirring the entire time until the custard thickens*, then remove from the heat.

Add the rum to the custard and stir. Place the rum-soaked chestnuts into the base of the pastry in a single layer (save any additional chestnuts for another use). Whisk the egg whites until they form soft peaks. Pour the custard on top of the egg whites and quickly fold together until just combined. Pour the custard mixture into the cake tin then sprinkle with a mixture of the brown sugar and cinnamon.

Bake the tart for 25 minutes at 190°C until set. When cooked there should still be a slight wobble in the middle. Leave the tart to cool before diving in.

*If the mixture heats for too long or is not constantly stirred then lumps will form. If this happens, then don’t worry, just strain the mixture through a sieve working it through with a wooden spoon. This does take time however, and may affect the end result, so is best avoided.

December 22, 2008

Quince 'Cheese'


The more I learn about the quince fruit the more fascinated I become. I was first introduced to the quince in London when I came across an article from my favourite market's
(Borough market) magazine that highlighted local artisans. Two women had started a line of preserves which was being sold in high end bakeries like Konditor and Cook and high-end delicatessens, but in addition to the amazing jams with flavour combinations like vanilla bean and strawberry, they made a traditional recipe of quince cheese. This raised some questions in my head. Like how do you get the quince in the cheese??

It turned out that quince cheese is a hardened jelly made with equal quantities of sugar and fruit (you can use any kind of fruit to make any type of cheese) cooked for several hours until turning a deep red colour which looks stunningly jewel-like. The grainy quality of the quince produces a wonderful texture, and when left to 'cure' for 1-2 months in a cool place the cheese becomes perfectly sliceable- great for cutting into cubes, eating as a sweet meat or powdered with sugar like Turkish delight, and for bolstering your rich meat dishes or gravy with a little je ne sais quoi.

The article mentioned that I could find the quince cheese in the market at Neal's Yard dairy- THE best place in England to buy (and taste) hundreds of artisan produced British cheeses. It was already one of my favourite places in the market, but it just got extra points. We stood in the long queue and bought some infamous quince cheese. We were instantly hooked.

History tells us that quinces have been used for cooking for possibly thousands of years originating in Asia Minor. They migrated to the Mediterranean where the Romans often served them stewed with honey. Today, especially in Spain, you will find that quince 'cheese' is regularly cut and served with a cheese platter, or sliced to accompany a lovely aged Manchego cheese, sometimes for breakfast.

When I discovered this autumn that quinces were growing in peoples' yards in our neighbourhood all I could think about was making quince cheese. My Eastern European neighbour is friendly with one of the households who lets the supposedly troublesome quince fall to the ground, and takes it upon himself to (I quote) "give them to the people".

Lucky me! The recipe for quince cheese seemed very secretive at first - I only knew that the ladies in London were using a traditional Spanish recipe that was completely natural using no artificial preservatives. With luck this summer I acquired two excellent books on preserves that had two differing recipes for quince cheese. Because only one recipe had a photo of the finished product I decided to go with that one, but it became an incredibly labour intensive process taking around 5-6 hours to complete. Possibly the method in the other book is less time consuming. The rewards of slaving away- battling the fibrous quinces- have certainly been great. The recipe made enough that we can enjoy it throughout the winter and still have enough to cut into 'cheeses' or coat in powdered sugar for Christmas gifts.

Give quinces a try - their fragrance alone is enough of a reason to experiment. They can be turned to fragrant jellies, cheeses, compotes, sauces and more to have with any food from a piece of toast to a richly flavoured roast dinner.


December 4, 2008

Fudgy Chocolate Cookies..with a dash of spice


This is just the sort of treat you do not expect to see sitting alongside a floral-print teacup and saucer. You know the type, unassuming and quiet, but incredibly tempting once you get to know it. Not the sort of devilishly enticing dessert you would normally see on tiered trays stacked alongside cold cucumber white bread sandwiches and pale white scones and cream. No, this cookie is far more intriguing. Playing on the classic combination of nuts, dried fruit and chocolate it makes use of the seasonal abundance of walnuts and raisins adding a little kick with some freshly ground black pepper that is reminiscent of Norwegian style gingerbread houses. The Norwegian gingerbread house after all is named a pepperkakehus

Now I must repeat the initial warning; this little cookie is simply addictive. After toying with a similar gluten free recipe that I produced some time ago, it seemed that the recipe should be taken to the next level by making use of the Fair Trade organic cocoa that I've been chipping away at for a while now- reluctant to use it for anything less than the thickest of hot chocolates.

I'm not a great fan of cocoa in baking- preferring to use a good quality bar of chocolate whenever possible. But given my expensive taste in chocolate it is, alas, not always possible, or in this case, even necessary. Having made some addictive fudgy brownies in the past I assumed that the melted chocolate was the key to success-especially in terms of flavour, but generally, at least where cookies are concerned, the fudgy quality really comes down to the right combination of ingredients, cooking times, and refrigeration before cooking always helps them maintain their shape in the oven.

So, I hope you enjoy this gluten-free chewy chocolate cookie recipe, to be produced as often as you desire. They will keep for at least 4 days in the fridge (but I couldn't say if they would last any longer...).

Fudgy Chocolate Cookies:

Makes 19 cookies

1/2 cup softened unsalted butter
1/2 cup brown sugar
1/2 cup organic cane sugar
2 large eggs
1/2 cup cocoa (Fair Trade and organic is recommended)
3-4 turns of a pepper grinder or approximately 1/2 tsp black pepper (optional)
1 cup gluten free flour blend*
3/4 cup roughly chopped walnuts or hazelnuts
1/2 cup raisins

*Gluten-free flour blend:
1/2 cup potato starch
1/4 cup rice flour
1/4 cup tapioca starch
1/2 tsp xanthan gum**
1 tsp baking powder

Cream the softened butter in a bowl, then add the sugar, mixing until completely combined. Add the eggs and mix until incorporated. Sift the cocoa into the mixture and stir well. Then add the black pepper, flour mixture, raisins and walnuts, and stir until completely blended into the cocoa mixture.

Refrigerate the dough for 10 minutes while the oven is preheating. Working quickly, take a heaped tablespoon of batter and, with lightly wet hands, roll it into a ball and place on baking sheet with two inches between each cookie. Bake at 350°F for 9 minutes only or until the cookies have become firm around the outside but the top is still soft to the touch (they will continue to cook for a few minutes when out of the oven).

Leave the cookies to rest on a cooling rack for a few minutes before diving in to savour the chocolate chewy cookies at their most dangerous, accompanied by a nice tall glass of milk.

** Just a warning not to add a 1/2 cup of xanthan gum to these cookies. My poor boyfriend found this out the hard way in his sweet attempt to make these cookies whilst not being familiar with the inherent qualities of this bizarre ingredient. Although we discovered what was wrong ('Arrhh! Why is this dough sooo hard to mix??') before the dough went in the oven we decided to run with it, and take advantage of the mistake, to see what kind of results were possible. Unfortunately, the fatal addition rendered the final product quite inedible- the texture nearly that of chocolate-flavoured chewing gum. Luckily for me he didn't give up. Trying once again, he mastered the cookie recipe, and made enough to satisfy our chocolate cookie cravings.

November 14, 2008

Pumpkin Sage and Sausage Reverse Risotto!

This recipe came about the other night while I was trying to find a use for the multiple food groups searching for a home in my fridge. My lovely neighbour had brought over some freshly made pumpkin purée the other day, and although we are inundated with the remainder of our pumpkin harvest, I still could not let this go to waste.

My favourite one-pot meal for a busy week-night is a fragrant, creamy risotto. I love the aromatic qualities of using white wine in cooking and nearly 1 cup goes in my risotto every time, along with some home-made chicken or veggie stock and a choice of seasonal vegetables (some fruit added to the mix will work beautifully too). I suppose the thing I like most about risotto is its flexibility. You can make this dish with a combination of any vegetables and if you have leftover pancetta, chicken, flaked fish, or sausage then this will make the dish into more of a meal and will add further richness.

In this case I used spicy buffalo sausage. Buffalo meat is really low fat and generally free range so I like using it from time to time, and as I found out, it makes a really nice sausage.
This is a reverse risotto because instead of sautéing the usual celery and onion together in oil at the beginning (in Italian this is called a soffrito), I first boiled the brown rice as it takes roughly 35 minutes to cook. At the time I used water, but using some chicken or vegetable stock would intensify the dish. The brown rice adds some more nutrition to this carbohydrate-intensive meal and also has a gorgeous nutty flavour that works particularly well with the pumpkin.

Makes 2 large portions:

Add 1 cup of washed brown organic rice to 3 cups water and/or stock that has been brought to a boil.

Add 1 bay leaf to the boiling rice and take 4 finely chopped sage leaves adding about 2/3rds to the boiling rice and reserving the rest.

Reduce heat to a low setting, give the rice a quick stir, and cover with the lid to cook for 30 minutes.

Take 1 long and thick mildly spicy sausage (or two regular sized sausages)
If the sausage is really long then chop it in half. What we want to achieve is one part of the sausage cut open, removing the outer casing if possible, so that when you fry it you're left with crumbly sausage meat, which you will then add to the boiling rice to impart more flavour to the risotto. The second part of the sausage (or the second whole sausage) you will leave whole and fry in a pan until completely cooked. When cooked then slice into bite-size pieces and add to the rice towards the end of making the risotto.

1 leak finely chopped- add this now.

Add 1 roughly chopped clove of garlic to the rice.

When the sausages are nearly finished cooking, take one of the sausages and break up the meat (make it crumbly) and add it to the boiling rice; the sausage will add more flavour if added to the rice at this stage and will finish cooking just after it hits the boiling water.

Have on hand at least 3/4 cup white wine. When most of the water has evaporated and the rice starts to stick then add the wine. This will be absorbed into the rice and will also de-glaze the pan. Stir well to incorporate. At this stage you want to work quickly being sure the rice no longer sticks to the pan.

Add the remaining sage leaves and 1 cup of organic* pumpkin purée. Stir and cook for several more minutes. Then remove the pan from the heat. Add 2-3 teaspoons of butter to the top of the risotto - this will give it a silky texture and a little shine. Once melted then stir in the butter, season with salt and freshly ground pepper to taste, and serve.
Optional: Grated Parmigiano Reggiano cheese is generally stirred into the rice before serving, however this risotto was so full of flavour it didn't even occur to me to finish the dish in the usual way, so the cheese can be optional. Apart from its wonderful flavour the cheese gives the risotto a silkier, creamier texture- probably the most alluring part of the dish, however in this case the pumpkin purée provides most of the desired creaminess.


*Pumpkins are naturally good at absorbing contaminants/toxins in the soil, so either eat pumpkins that are grown organically, or be sure of where your pumpkins are coming from.

November 6, 2008

Fresh Tomatoes....in November


When it reaches the time of year when the clouds start settling in and blanketing the sky, and the cold rains start to fall signalling the first snows of winter, I think you can understand me when I say that it simply feels weird picking tomatoes in November.

However weird, it's incredibly satisfying. After taking advice from numerous organic gardening books and from fellow gardeners I dug up my tomato plants in early October before the first frosts, and brought them inside to hang upside down from the doorknobs of our foyer closets to allow the plants the chance to ripen the tomatoes from green to red.

Let me just say that the sensation of harvesting tomatoes indoors is so bizarre. Crouching down on the tile floor, absent of the soil under your feet and the cool breeze around your ears, everything is really quite comfortable. No taking off muddy boots, no sniffly nose, and no forgetting to bring enough bowls outside to collect the harvest. I can't emphasise more the joys of harvesting tomatoes inside and in comfort. In addition, and most importantly, nearly all of my tomatoes aside from literally a few, have turned red. I just picked the last crop today and it's November 6th...and the cold November rains have definitely started. So excuse me if I do a little leap in the air in defiance of the cold weather and let out at a jolly "HA HA HA!"followed by the biggest smile, because I have the last little balls of summer sunshine in my hand just begging to be enjoyed!

Now I suppose it's time to come up with a great recipe to celebrate the last harvest. But I can honestly say that there is no recipe that is quite as satisfying as popping one of these sweet, simple, unadulterated tomatoes straight into your mouth and savouring the last products of the summer's sun.

Happy harvesting everyone!

October 21, 2008

Forays into Cider-making...and bear-tracking!


Alright, so perhaps the 'bears' part is a little exaggerated, but I just HAD to mention that while hiking around a lake the other day we were as good as following a bear, and ran into not only 9 bear 'patties' but also several pairs of footprints...luckily no bear though. It's a strange feeling being so close to them- your heart performs little leaps of excitement and fear and often your legs start carrying you in the opposite direction. We've been collecting various tidbits of information from locals who have had run-ins with bears. Apparently it's best to ward them off by trying to make yourself as big and scary as possible ('playing dead' is sooo passé). If you're cycling, then it's best to lift your bike up over your head and wave it around like a mad person, and then you'd best be on your way ; )

Okay, back to food!! Or shall I say drink!

My culinary adventures have been a little all-over-the-place this season- more so than when I lived in the UK, which may have something more to do with the ability to now pursue more diverse activities than was possible before. Such as Cider making!

Another difference of course is that we now have a car, which is wonderful for hauling things around, such as large glass bottles (carboys) for fermenting apple juice, and we also have the space required to set-up an indoor fermentation area. I realise that producing your own rustic alcoholic apple cider may not be a priority for everyone, but I couldn't resist sharing this adventure with you, even if the cider doesn't turn out (it's always trial and error for the first attempt).

Additionally, I've been working in a winery all summer long, and because the company's training was so good I've subsequently developed a taste for great wine and learned heaps about winemaking- just the tip of the iceberg mind you- but more than I would have learned by just drinking the stuff. This has sparked a longing to produce my own brews at home. I wouldn't however really recommend wine-making at home (although everyone here does it!) because the quality will probably not be as good as the $20/£10 bottles you may have become accustomed to. So, we decided to take on the relatively simple project of cider making. For one, because we really like it, and two because it's nice to have a beer-replacement on hand when you're gluten-intolerant.

I won't go into too much detail about how we made it because we're still unsure of the results, but I can say that we used roughly 20% wild crab apples, 30% dessert apples, and the remaining apples were sweet, but higher in acidity than most dessert apples. The blend of various types of apples directly affects how sweet or how dry your cider will be. We prefer a sweeter cider so we used more dessert apples; this is just as well because there aren't many non-eating apple varieties in this valley.

A good cider, like a good wine, may rely a lot on wild yeasts that will have accumulated on the actual cider making equipment and in the cider production room over the years. Because this is an old fruit-growing area we reckoned there were plenty of nice wild yeasts, but because we didn't have any age-old equipment we gave the cider a helping hand with one small packet of champagne yeast. Apparently in the UK you can order cultivated cider yeasts, but champagne yeast will also do the trick. We didn't have a mechanical press so it was advised that we hand-squeeze the pulp through muslin bags. Luckily what we do have is a Vita-Mix- a super powerful blender that will even chop wood! So we chucked the apples in there bit by bit until they were puréed, then emptied the blend into a bag and squeezed it. Sounds simple right? Well the whole process took over 8 hours of hard manual work and lasted until 1 a.m. But given that we may have 30 bottles of (hopefully good!) cider at the end, it's really not that much effort, and the whole process is also so very fun and satisfying.

The cider has been fermenting for 10 days now and is starting to slow down. When it stops we will have crossed fingers hoping for a sweet, not dry, cider (the basic rule being that during the fermentation sugar is turned to alcohol and the longer the cider ferments the more sugar is converted to alcohol and the less sweet your cider will be).

I will let you know what the finished results were as soon as we open the first bottle! Strangely enough cider making is a win-win situation. If it all goes wrong then at the very worst you're left with cider vinegar, which is perfect for cooking with. If you too are interested in pursuing the art of making cider then a great place to start is at the UKcider site. I hope you enjoy the rather graphic, and not at all pretty, action photos attached.

Cheers!

October 1, 2008

Apples and Starfish


At Salt Spring Island's Apple Festival. This past weekend we headed down to Vancouver and took the ferry across to Salt Spring Island- home to celebrities and farmers alike, towns named Vesuvius and Ganges, the most 'green' approach to living that I've ever seen in Canada, and to top it off – one of the BEST farmers' markets and an amazing apple festival showcasing over 300 types of apples!

I'm a bit of an apple freak (if you haven’t already drawn that conclusion)- eating a few apples every day throughout the autumn and as far into winter as possible- my entire life has been spent living near apples. Firstly near the Annapolis valley in Nova Scotia, then in the Okanagan valley of British Columbia, followed by 7 years in southern England- home of 'Scrumpy' cider and hundreds of heritage varieties, so it’s no surprise that we would travel 8 hours over mountains and ocean to attend the largest apple festival in Western Canada.

The one day apple event not only included many heritage varieties brought over in the late 1800's from far-flung places like Holland, England and Germany (including great apples for making cider!), but also showcased many new varieties - some of which were developed in my home town in the Okanagan valley. Apples with fetching names like Washington Strawberry, Gravenstein, Lodi and Pitmaston Pineapple couldn't help but draw attention from thousands of attendees.

The festival was a great opportunity to sample some incredible apples and local food (especially the seafood!), travel around the island from orchard to orchard and meet the farmers who loved to talk about the growing process, to buy generally unknown varieties and to have the chance to inspect an amazing cider press made of steel and oak- of great inspiration to a non-beer drinker who hopes to make her own cider this fall if she can get the equipment together in time!

I didn't pick up any recipes per say from Salt Spring, and we ate out the whole time (the seafood chowder was amazing!), so instead of publishing a recipe I'll leave you with some pictures of the apples, the cider press (who knows- you may want to replicate this too), and the beautiful island. Watch out for those doilies!

Happy picking this harvest season!

September 17, 2008

Peach and Blueberry Amandine Tart


When I made this peach and blueberry amandine tart I gathered up some inspiration from several sources. Firstly, the garden ("what am I going to do with all those peaches?!"), the need for a quick, crowd-pleasing dessert for a dinner with our lovely neighbours, and most importantly from Clotilde Dusoulier's Chocolate & Zucchini cookbook where her recipe for a classic French amandine tarte with blueberries was not only a wonderful recipe, but utilised a special pâte sablée dough for the tart base, whose method and ingredients were perfect for me to adapt to a gluten-free pâte sablée-esque crust.

In fact, I'm still getting over the surprise that the gluten-free version came out so well. The crust has an incredibly buttery, crumbly (but held it's shape when cut), melt-in-your mouth texture, ...and for the record, it held together beautifully for it's entire 2-day lifespan- a surprising accomplishment for naturally crumbly dough.

This recipe comfortably feeds 10 people including several 6'4" men especially hungry for dessert.

In addition to the dough ingredients below you will need:
A 28cm tart pan (if your pan is slightly smaller then reduce the amount of butter in the filling by 25g, and omit the whipping cream)

200g fresh blueberries
2 very large peaches or 4 medium peaches
100g ground almonds
100g unsalted butter at room temperature
2 large free-range eggs
1/4 cup whipping cream (double cream is okay too)

First, prepare the dough. The dough should be chilled for at least 30 minutes, but can be chilled for up to 1 day. (makes just enough to line a 28cm tart pan)

85g sweet rice flour
75g potato starch
45g tapioca starch (or 25g tapioca starch and 20g buckwheat flour if you don't mind tasting the buckwheat a little in the end product)
100g unsalted butter at room temperature
75g fine-textured cane sugar or caster sugar
1/4 tsp sea salt
3-4 tbsps milk

If you're using a food processor then add the sugar, flours, and salt, then add the butter, pulsing the mixture just a few times to create a consistent crumbly texture. Then gradually add the milk one tablespoon at a time and pulse the mixture to bring the dough together. If you are not using a food processor, then do the following:

Combine the sugar, flours and sea salt and sift together into a bowl. Add the butter in small pieces by using a knife to shave pieces off the measured block into the bowl. Use a wire pastry blender or your fingers to rub the ingredients together until you have a fine, crumbly texture. Add 1 tablespoon (tbsp) of milk at a time, lightly stirring the mixture after each tablespoon. After 2 tbsps of milk then try to clump the dough in your hand. If it stays together then you've added enough milk, but if not, then gradually add another tbsp or two until it clumps successfully. This means that the dough is malleable and will hold together as a tart crust.

After chilling for at least 30 minutes the dough can be carefully pressed by hand into a buttered tart pan to form a thin, even layer on the bottom. Proceed to work the crust piece by piece into the sides of the pan. This may take a little time, but is well worth the results. Be sure to cover any cracks or thin areas in the pastry by patching it with more dough where necessary.

Preheat the oven to 180°C then bake the tart shell for approximately 10 minutes. The colour should be lightly golden but not browned. Leave the crust to cool while preparing the filling.

For the amandine filling
Make the almond cream by stirring together the sugar, salt, and ground almonds. Add the softened butter and blend together either in a food processor or with an electric whisk. Next add the eggs one by one blending in between each addition until the mixture is smooth (this step seems silly, but chemistry is complicated, and I've learned from trial and error that this step will decide the fate of your almond cream), then stir in the whipping cream. Peel the peaches either before slicing (by blanching them in a pot of boiling water for 10 seconds) or after each slice with your knife. Cut the peach into slices about 1.5 cm thick and arrange on the bottom of the tart pan, then pour the blueberries and disperse evenly between the peaches.

Pour the almond cream over the fruit and level the top with a spatula. Return the tart to the oven to bake for 40 minutes. Be sure to check the tart after 30 minutes to be sure it is not being overcooked (some oven temperatures are much higher than they seem- an oven thermometre is a worthwhile investment). Remove the tart from the oven and leave it to cool completely. The tart can be refrigerated covered with plastic wrap if making in advance but just be sure to bring it back to room temperature before serving.

This is a very flexible tart with many possible variations. It can also be made with nectarines, pears, raspberries, blackberries, or plums, with additions of lemon or orange zest if you like, or a tbsp of liqueur such as amaretto, to bring out the almond taste even further. If you omit the fruit, consider lining the bottom of the tart crust with pieces of chocolate, for an even more decadent dessert.

September 8, 2008

Peach Tomatillo Salsa


A glut of peaches. Who would have thought?

After 7 years living in the UK I had started to think of peaches as a rarity- an extravagant purchase that should be celebrated and used with the utmost care in only the summer months. So it's not surprising that, although I am now inundated with peaches, I can't seem to get enough of them. They've been going into pies, tarts, jams, chutneys, jars, and of course the freezer.

In an attempt to make something less traditional, which would also preserve the genuine subtle sweetness and floral scent of the fresh peach, I decided that a salsa could be just the thing. It may not last throughout the year, like a traditional preserve, but the addition of lime juice and spicy jalapeño pepper mean a slightly extended life for the much adored end-of-summer fruit.

To add some more subtle flavours that would not overpower the peach, and to make the most of another seasonal glut- the renowned zucchini (courgette)- some zucchini, and more traditional salsa ingredients were added, like coriander, lime juice, and finely diced white onions. A little tartness and bite was introduced by adding some bright green tomatillos that I found at the market, complete with their husks still on. Finding such unusual gems at the market was a first for me, and I couldn't believe my luck. Tomatillos are a relative of the gooseberry and as you probably are aware, if you bite into a raw tomatillo, you will find out why. To overcome the tartness it's best to first roast the tomatillos on a tray in a hot oven until the skins are slightly darkened and collapsed.

For the salsa:

Take 1 lb of fresh tomatillos and remove their husks. Coat them in some oil and roast in a 200C oven for roughly 20 mins until the skins start to collapse and slightly char. Note: if you can't find fresh tomatillos, then canned ones are just as good and they're pre-roasted for added convenience. Leave the tray to cool while preparing the other ingredients.

Sterilise 3 medium, already washed jars (roughly the size of salsa or jam jars) in the microwave for 2 mins, or you can lay the jars on their side on a cookie sheet and sterilise them in the oven at 170C for 20 minutes, and boil the lids for a few minutes in a pan- remove these from the water with clean tongs or a strainer being careful not to touch any part of the lid with your hands. Leave lids to air dry.

Finely dice the below ingredients, or if using a food processor, then process each ingredient separately - they will all be combined at the very end following the dicing of the peaches:

1 medium zucchini (about 5 to 6 inches long)
3 medium white onions
A handful of coriander (cilantro) leaves
Blend together:
1/4 jalapeño finely diced (this salsa is very lightly spiced- do use more jalapeño if you like more heat!)
The juice of 3 limes

Roughly chop the cooled tomatillos, or pulse the tomatillos in the food processor- they only need 2 to 3 pulses.

The peaches (do this last to reduce browning):
Take 3 large peaches
Blanch the peaches in boiling water for 30 seconds then lift out with a strainer and put into cold water. Tip: It’s easiest if you cut the peaches in half first, then peel and remove the pits. Cut each peach into halves and peel, then dice finely, or cut into quarters and process with a few pulses.

Mix all ingredients together and fill into the sterilised jars. If you have a funnel then it will be extremely useful at this stage. Otherwise, don’t worry about making a mess. Fill the jars right to the top with the salsa and tighten the caps. The jars should last up to 3 weeks in the fridge.

September 3, 2008

Happy First Postings

Well Hi everyone! This is officially my first posting and it's coincidentally my birthday too...so Happy Postings!

I'm still coming to grips with the finer details of creating a good blog so please bear with me over the coming weeks while I fine-tune the formatting.

I hope that over the course of writing this blog I hear from many of you about the quirky creations in your kitchens, and what lovely produce is growing in your gardens (if you garden of course- and if you don't, then please talk about food- I'm all ears.... or possibly eyes and stomach would be more appropriate).

I will be relaying the latest news about my garden and the subsequent fun had with the sweet, fresh produce in the kitchen (or should I call it the lab), the trials and new discoveries, hopefully some tips as I learn day by day what works and what doesn't (especially where the garden's concerned), and posting the recipes that work and taste the best.

Because I am gluten intolerant you will most often see baking recipes that are gluten-free. My apologies in advance if the use of 3 or 4 different flours do not coincide with the packet of all-purpose flour in most of your cupboards, but with luck those recipes where flour substitutions are used, will be useful for some people who are in similar situations. Now, a word of warning, I am only gluten-intollerant, so it is always possible, perhaps one day, that I will lapse into a craving for gooey, buttery, flaky, absolutely oozing from the centre almond chocolate croissants, and may try for weeks trying to recreate the sweet memory from France, but until that eventual day, this blog will be gluten-free.

If there's one thing I'd especially like everyone to take home from this blog, it would be the desire to start growing your own food in some capacity- even if it means a few herbs on the windowsill, or tomatoes in pots on the balcony. There is nothing easier, tastier or more satisfying.... except perhaps chocolate, but it doesn't have the same everlasting effect, and doesn't contribute to nearly as many meals!

See you soon at Garden to Ganache- Happy blogging!

Elana