July 7, 2010

Homemade Ricotta and Tips for Growing Garlic

It’s that time of year again- not much time for writing about gardening and just enough time to delight in pinching out tomato side-shoots, taking a stroll past the peas - nibbling as we go, and for checking on the general progress of what looks to be a generous harvest to come.

Today was the first day where we’ve had enough crops come in so as to cover the kitchen table, and enough to make a salad worthy of a meal. Broad beans, 2 types of lettuce (marvel of the four seasons and buttercrunch), a spring mix of sorts, arugula (rocket), coriander, peas, our entire first crop of garlic (what a sight!), and enough basil to make our first batch of Genovese basil pesto!

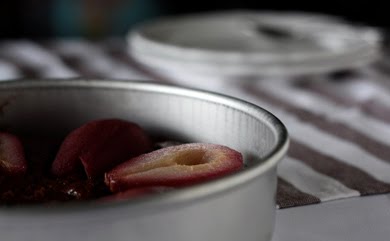
On top of that, today I finally tried making ricotta from scratch. Well, not completely from scratch of course, but enough to report that it’s an incredibly simple process. So easy that, by the end, I was wishing I’d made it every week since I first read about how to make it on Chocolate & Zucchini. As it says on C&Z, the ricotta does taste a lot like the milk it comes from…and my ricotta was okay, but not quite as sweet as I’d hoped for. My guess is that the sweetness, despite using organic milk, can be best achieved by using milk that’s very fresh off the farm and ideally unpasteurized, for taste and for health benefits.

Unfortunately in Canada, at least in BC, it’s impossible to buy unpasteurized milk, so my advice is to make friends with your local dairy farmer and see where that leads you. I’d still try making it at home, at least once, just to see how easy it can be. Who knows, perhaps one day you'll be in desperate need of ricotta and the store will have run out. Well, now you know how to make it, and ricotta only requires whole milk (homogenised milk), buttermilk, and cheesecloth (muslin).

**************************** 

Garlic- my new love!
We harvested our first crop of garlic today- 24 enormous, beautiful bulbs. From this day on, I will always grow garlic whenever possible. The smell of it straight from the garden is reminiscent of the best markets, (sorry friends, but I won’t be spending $2 per bulb any more), and of the braided strands (plaits) of garlic hanging from market stalls in Provence.

On the subject of garlic braiding and fresh garden produce, I'd like to recommend an excellent book. It's one that every serious beginner gardener should own, called The Zero-Mile Diet by Carolyn Herriot. Although based on Vancouver Island where the climate can be quite different from the dry interior of BC, all the essential information is there. How to make an excellent compost, how to grow many types of vegetables in your home garden, including some more interesting varieties, how to save seeds, and most importantly…how to braid garlic (hee hee)! Exciting times lie ahead on the garlic front. In the meantime, until I learn how to braid garlic properly…my house will continue to smell of garlic while it’s drying! I love garlic, but that is honestly quite the incentive.

Top tips for growing garlic - as passed on by my wonderful garlic vendor at the farmers' market- and a few tips from me:
-         -  Buy organic garlic seed cloves from your local farmer’s market

-         - Plant garlic in the fall (some books recommend planting garlic in the spring but I haven't had very much success with this, and the garlic bulbs are often small). The garlic’s roots will start to form throughout the winter, and by the time spring arrives, you’re off to the races, so to speak!

-         - The seed garlic cloves can have a hard 'nub' at the bottom where the clove separates from the bulb. If it looks hollow then it’s ready for planting, but if rounded, then use the tip of a knife to lever out the ‘nub’. This will allow the roots to form more freely.

-        -  In early summer/late spring (usually June) garlic will produce green shoots from the stems called garlic ‘scapes’. The scapes feed off the bulbs, so it’s best to remove them (great for use in salads or in an omelette etc) to allow the garlic to grow bigger.

-         - Harvest your garlic in July when 2/3rds of the plant has turned yellow (at this point the stem might start to angle/lean over slightly as well).

I hope this helps to give you a good start in growing your own garlic this autumn, and that the intro to ricotta makes cheese-making a slightly less mystifying process, not to mention more accessible.

Happy gardening!  

June 21, 2010

Strawberry Rhubarb Parfaits with Poached Meringues

I guess the question should be asked. Are poached meringues deserving of a comeback? Does anyone even remember what they are? Or are they too retro and French-country to join our contemporary tables? Well, if given a moment’s thought, modern cuisine is all about simplicity, and highlighting the best attributes of any given ingredient. So I suppose you could say that there isn’t anything simpler in taste (egg white + sugar) and true to an egg’s unique properties, than a poached meringue, but I suppose that might be up for debate?

Poached meringues are exactly what the name implies - egg whites beaten with sugar until stiff, and generally shaped into quenelles (little football shapes made with 2 spoons) for presentation. There are two tips to keep in mind when first attempting poached meringues- there may be more tips, but I was only able to grasp the two in my first attempt: keep the water hot, but barely simmering, and save poaching the meringues until just before serving.


So here’s a little seasonal recipe to try- a variation on the classic French dessert ‘iles flottantes’ or floating islands. Making the most of organic eggs from a friend’s farm, and seasonal fresh strawberries and rhubarb, this dessert is both rich and zippy from the sweet/sour combination of the fruits. This is also a good way to use up some frozen fruit if you’re in ‘freezer-clearing’ mode like I am. This recipe may come in 3 parts, but each part is really easy. And, if you’re in a rush, you can leave out the poached meringues, making just the fruit and custard.

Strawberry Rhubarb Parfaits with Poached Meringues
Serves 4

For the custard: (this can be made up to 1 day ahead)
2 egg yolks (reserve the whites for the meringues) + 1 egg
250ml whipping cream
250 ml 2%/semi-skim milk
1/3 cup sugar

Heat the milk and cream until heated through and nearly boiling; remove from heat. Whisk together the sugar and egg yolks in a bowl that ideally has a pour spout. Add the heated milk to the egg mixture (keep the pot at hand) whisking until completely combined then return to the stove top.

Stir constantly on low heat until the custard thickens (about 8 minutes of your undivided attention is required here but is well worth it- if you stop stirring for more than 30 seconds(ish) then the custard may curdle).

You'll know the custard is done when you can clearly draw a line through the custard on the bottom of the pan.

Vanilla custard is one of my favourite desserts in the world, and can be used in a variety of different desserts; it’s definitely worth a few minutes of your time to make it from scratch with good quality ingredients. For a more extravagant custard recipe using vanilla bean see here:

For a frozen fruit compote:  mix equal parts cherries and strawberries and stew on very low heat until defrosted and a little juice has formed in the saucepan. Add in some 1”long sticks of rhubarb (cut 1 stick of rhubarb into 1/4s lengthways, then into 1” pieces) until steamed through, then thicken the sauce by removing the fruit with a slotted spoon and adding 1 tsp cornstarch dissolved in 2 tsp water. Stir, then add the fruit back in.

If using fresh fruit: steam the rhubarb with 1 tbsp water and 1 tsp runny honey and add to sliced fresh strawberries. Then top with the custard followed by the poached meringue.

To make the poached meringues:
Beat 2 egg whites with an electric hand mixer and add a pinch of cream of tartar (this will make the meringues hold together better) until soft peaks form. Then continue to beat, adding ½ cup sugar, one third at a time, until glossy and firm. Shape the meringues into quenelles using 2 tablespoons (see link above) and follow the below 2 tips:

1. In a sauté pan bring the water to a boil then lower the temperature to barely a simmer, keeping the lid on. Have everything ready before you do the poaching. Make the quenelles using 2 tablespoons, add them to the water and immediately cover with a lid, and cook/steam them for 1.5 to 2 minutes until set.

2. Drain the meringues by lifting them out of the pan using a slotted spoon (place paper towel beneath the spoon to instantly wick away the moisture before adding them to the custard). Have your sliced fresh fruit, or fruit compote, ready in the serving glasses and topped with custard before poaching the meringues.

Enjoy

June 10, 2010

Chilli hot chocolate and then some


Mmm...I just made a cup of thick hot chocolate with a Mexican twist, compliments of one of the best chocolate companies out there- Taza. And as they say on the back of the wrapped discs: "a small chocolate maker in Somerville, Mass. We use traditional Mexican stone mills to grind this unique, intensely flavored chocolate for eating and drinking". And if that didn't sound good enough...unlike other more well known Mexican-style (drinking) chocolate producers, like Ibarra, Taza chocolate is certified organic, and the company has a Direct Trade relationship with the growers where more money makes its way to the growers than even through the Fair Trade label. They also package it in the form of 2 discs, which makes for easier melting, and for easier snapping in half to make chocolate for one if you wish- and even then just half a disc will suffice. Also, the chocolate comes in fantastic flavours like Guajillo chilli (what I'm drinking now), vanilla bean, and salted almond. 

As I write, the hot chocolate is keeping a really nice, constant heat...but a skin is definitely forming on the top...off skin off! Okay, it's off now. I ate it. And it tasted really, really good. (Not like the skin that forms on top of a latte which for some reason is completely awful). 

So how did we find the Taza chocolate you may ask? Well, I didn't order it online, although always tempted. We actually stumbled upon it while in Santa Cruz for a wedding last September. On the way to the hotel we had the pleasure of stopping by a great local organic shop to pick up some things for breakfast - it had the most incredible selection of chocolate for such a small establishment- I guess the locals must have great taste!? Certainly we can vouch that the local, even home-brewed, wine was excellent...ahh to live in California. This was also where we learned that the infamous Santa Cruz juice actually comes from... Santa Cruz. Well, at least it appeared that way, what with the 30 or so different varieties of juice and juice blends on the shelf- it's pretty safe to assume. Needless to say we drank a litre of the stuff just overnight. And after a wedding...who wouldn't!

I digress...back to the chocolate.  First of all, I wish I had their job- those lucky (and incredibly brave, hard working and dedicated) owners of Taza. My 'get out of the rat race' dream is to have a sustainable, ethical cocao forest of chocolate trees interspersed with rainforest in some tropical paradise somewhere, with papayas and bananas growing within reach throughout the property.

It might look something like Willie Harcourt-Cooze's chocolate farm and factory. Willie's chocolate is only through UK retailers but, lucky for us, they are now shipping worldwide. This chocolate is also seriously good...less refined (more granular but also packed full of flavour) and available in 100% cacao cylinders, which can take a while to use, but I try to grate some from time to time into savoury dishes; this works very well with roast lamb and rosemary in particular. Their very innovative, South American influenced chocolate recipes are available online, and their wonky but 'makes you feel like a kid again' website is great fun exploring- especially the videos of Cooze- clearly a brilliant, uninhibited man with endless energy who would certainly make Willy Wonka do a double-take. 

So, after all this talk, am I going to leave you with a chocolate recipe? Of course!

A rough hot chocolate recipe:

One trick to making a thicker hot chocolate...and celiacs will appreciate this too...is to add about 1 tablespoon white rice flour- whisked in to avoid lumps of course.

Melt 1 disc of drinking chocolate (or make a paste of sugar (to taste) and 2 tbsp cocoa with some milk in a pan) on low heat in a small saucepan. Add a splash of whole milk to prevent burning and stir in the melted chocolate until there are no lumps. Then add 2 mugs worth of milk - this could be a combination of whole milk and 2% (semi-skimmed) - and heat until heated through. Whisk in 1 tbsp of white rice flour and gradually bring the hot chocolate to a boil, being sure to run a wooden spoon over the bottom of the pan to prevent sticking or burning. Let boil for just a minute, whisk to make it a little frothy, then pour into mugs.

Enjoy as a dessert for 2.

May 13, 2010

Jicama and Asparagus Spring Salad


I made this salad the other day, and for the first time discovered what makes jicama so very special... its sugar! Combining the sweet jicama with sour lime juice and lightly steamed fresh asparagus and bok choi, the salad made for a great side dish for dinner on a warm spring day. 

It's always fun to mix local and unlocal produce at this time of year when you're still waiting for the first peas and broad beans to come up. Because Jicama is definitely imported, I'll only have it once in a while, and for this reason, this was the first time I've managed to use it in the way it's intended- freshly. Previously, my only introduction to the root vegetable had been through seeing it cooked in the traditional Northern style (boiled, steamed), as a substitute for turnip or similar.

If you're going to invite a new vegetable around for dinner it's always best to know it's likes and dislikes, right?  In many countries where Jicama is grown you'll find it mainly used in fruit salads and in other dishes with a refreshing, pick-me-up nature - a great use for a starchy root vegetable with high amounts of fructose.

Jicama is a root tuber that is generally grown in tropical climates, although with a good greenhouse and a mild climate I don't see why you couldn't grow it in parts of this country and in Europe too (however it's good to keep in mind that only the root is edible- the rest is actually poisonous!). Jicama looks similar to a yam with it's very white interior and brown, paper-like skin, however it has a unique, crisp texture as it's made up of 90% water- similar to cucumber. It might be worth trying to squeeze out some of this water through a cheesecloth some time...who knows, it might even make a refreshing summer drink.

Jicama and Asparagus Spring Salad

2 green onions (scallions) sliced finely and soaked in cider or white wine vinegar to cover
3/4 of 1 jicama, peeled and cut into roughly 1.5"x1.5" strips, then thinly sliced
handful of fresh asparagus, cut into 2" long pieces
1 'head' of bok choi, washed and leaves and stems separated- stems cut in bite-size pieces
5-6 green/filled olives cut into quarters
pinch salt
juice of 1 lime
small handful of cilantro leaves- a few stems are okay too, roughly chopped

Place the sliced jicama in a mixing bowl with the lime juice. Drain the green onions after they've been soaking for a few minutes in the vinegar and add to the jicama along with the pinch of salt. Stir to coat all the jicama slices in the lime juice. Add the chopped olives.

Boil water in a pan and add the asparagus to cook until just tender. Have some ice and water (mostly water) ready in a bowl. When the asparagus is just cooked remove and plunge into the ice water to preserve it's great colour. Do the same with the bok choi starting with the stems followed by the green leafy tops.  Remove from the ice water using a sieve or slotted spoon and add to the salad. Add the roughly chopped cilantro leaves, toss to coat and serve.

May 8, 2010

GF Chocolate Clafoutis with Pears poached in Red Wine


As presented at the Choices gluten-free health fair today.

This recipe is adapted from the book Green & Black's Chocolate Recipes - a great source of decadent recipes and an endless source of inspiration. Now gluten-free, you can take this dessert to dinner parties with friends, or keep it simple, even skip the wine, and serve it up to your family after a feast. The individual portions are mostly pear, so it's a deceptively light dessert. Glam it up by serving with a port or fortified wine, or dress it down by using really ripe pears and skipping the wine and poaching stage for an even easier dessert.

Enjoy :)

Serves 6

Use a 9” cake pan, tart or quiche dish
Need: 4 mixing bowls (2 must be heatproof)

3 pears (just ripe), peeled [the pears can be poached in red wine the day before and chilled]
1/2 bottle red wine* (reserve wine after boiling the pears to make mulled wine-see below)
Juice of half a lemon (organic, unwaxed)
2/3 cup cane sugar

1/8 cup +1 tbsp unsalted butter (1/4 cup plus 1 heaped tbsp)
50-60g (half a large bar) good quality** dark chocolate at least 60% cocoa solids (100g)

1/4 cup rice flour (1/2 cup)
2 tbsps tapioca starch (4tbsps)
2 tbsps potato starch (4 tbsps)
1/4 cup (rounded- not levelled off) of ground almonds (1/2 cup)
1/2 cup icing sugar (1 cup)
pinch fine sea salt
1/2 tsp gf baking powder (1 tsp)

2 large eggs, separated (use only one of the egg whites, save the other for an omelette…or pancakes) (3 eggs – beat only 2 egg whites)
1/3 cup full fat milk, but 2% also fine (2/3 cup milk or milk substitute (rice or almond milk)

Fit the peeled pears, stems still on, snugly into a pot with the lemon juice, sugar, and red wine. Bring slowly to a boil, so as not to scorch the bottom, and gently simmer for 20 minutes. Turn off the heat and put the pan to one side, letting the pears cool down in the liquid for another hour.

Melt the chocolate in a heatproof bowl (stainless steel is perfect) in the oven on very low heat (150°F). In a separate heatproof bowl do the same with the butter. When melted, brush some of the butter over the inside of your baking/serving dish and keep the rest to the side.

Preheat the oven to 400°F/200°C

Slice the pears vertically and remove the core and stem- a melon-baller is the perfect tool for coring.

Place all the dry ingredients except for the almonds into a bowl along with the icing sugar and salt. In a separate bowl, whisk the egg yolks with the milk until frothy, then whisk in the melted butter and chocolate. Sift in the dry ingredients and gently fold them in, followed by the ground almonds.

Beat the egg white(s) and add just a little to the chocolate mixture to help loosen it, and then very gently fold in the rest of the egg white- this will be just enough to keep the final clafoutis from becoming too firm.

Contrary to what you’d do in a glutinous clafoutis, place the pear halves in the baking pan first, either with the cut half down in the pan, or alternate the halves facing up and down. Then pour the batter between and around the pears, leaving the pears peaking through. Bake for 16-18 minutes. Keep a watchful eye as this dessert can take only 15 minutes in a convection oven, and 20 minutes in an older oven. This dessert is meant to be luscious and a little gooey- a toothpick inserted in the cake should not come out clean. For a dish awash with chocolate, sprinkle cocoa over the top just before serving.


Notes:

*The red wine adds lots of flavour and complexity, but if you’re in a rush and don’t have any wine on hand, here is an alternative:

Peel 3 ripe (but not overly ripe) pears, leaving stems on. Make a spicy syrup by adding to a saucepan 2/3 cup cane sugar, the juice of 1 lemon, 2 whole cloves, a small (4”) cinnamon stick, 2 cardamom pods-crushed. Add the pears and slowly bring to a boil then reduce to a simmer for 30 minutes. Remove from liquid and allow to cool before slicing and coring as above.

**Recommended brands of chocolate:
I recommend buying fair trade chocolate like Cocoa Camino bittersweet, and the non-fair trade but high quality commercial varieties such as Lindt 70% and Valrhona chocolate- harder to find but is guaranteed high quality and high ethics.

Idea: Save the red wine and make into mulled red wine by adding a lemon peel (rind only), a couple cloves and a cinnamon stick- simmer lightly for an hour. It’s quite the treat on a cool, spring day and can always be served along side the Clafoutis as a spicy aperitif.

March 21, 2010

How-to Chocolate cake (gluten-free)

There may still be a chill in the air but spring is definitely here.  A hike yesterday through a park near our home yielded ample opportunity for wildlife spotting.  Not expecting to see anything, we stumbled upon black birds with striking red-tipped wings foraging with their female mates in a nearby wetland, marmots hanging out near a chicken-coop, and quail shouting their spastic alarm calls as we strolled past their hiding places underneath the forest brush.

As you can expect, after our long walk we were pretty hungry and, following a healthy lunch wink wink, I got to work on a double-layer chocolate cake!  I tried a recipe for a decadent-looking gluten-free chocolate cake that I’d been meaning to try for a while.  It took a little more prep time than I’d hoped for at the beginning, but the results were excellent. When I told my boyfriend there was no flour in the cake batter he was absolutely astonished, “just almonds” I said, and of course wished the cake batter recipe had been born of my own ingenuity. Apart from my additions of the chocolate ganache topping, and cream cheese, kiwi and Bing cherry filling, and I’ll keep the credit for these thanks very much, the credit goes to Dinah Alison whose book ‘Totally Flour-free Baking’ I bought while still living in London.

Although not all of the recipes are as easy to recreate as the one for chocolate cake, Dinah’s experiments in creating the lightest batters possible have resulted in a very nice cake, with nearly the same ‘crumb’ texture as a flour-based cake. I personally find regular (non gf) cakes too floury; the cake usually more reliant on the raspberry filling, or the thick topping of icing to deliver the wow factor, instead of what should probably be a superb flavour distributed throughout the cake itself. This cake delivers exactly the latter; a great punch of super chocolaty-ness while at the same time not being too rich.

Dinah has discovered a cake’s “lightness of being” so to speak, or as they call it in Chinese ‘Qin Gong’, but don’t quote me on the spelling.  It’s a bit like the Kung Fu flying scenes in Crouching Tiger Hidden Dragon…only in a cake… is that a little abstract?  Anyway, the secret to achieving lightness, and this will only apply to cake I’m afraid, is using lightweight ingredients such as icing sugar instead of cane or granulated sugar, cocoa instead of melted chocolate (unless you’re going for the dense chocolate brownie effect), and always, always stiffly whisked egg whites.

But there’s more…Dinah Alison goes the extra mile and pre-whisks the egg yolks and then pours this over top of the whisked egg whites, which is then quickly folded all together. What a brilliant idea! And then, after sifting the dry ingredients, not once, but twice, through a large sieve (I used a colander because the mesh of my trusty sieve is too finely woven for the ground almonds to get through it), the dry mixture is dusted over the top of the eggs and folded in with a large spoon, as you would do with any recipe where you want to keep as much air in the batter as possible.

So, now that I’ve let the cat out of the box, I’d better stop talking, and let you source the original recipe for yourself.  But if you keep these techniques in mind and play around with quantities of ground almonds, icing sugar and cocoa and the eh hem…6 eggs (separated) that are required…then you might easily come up with an equally brilliant recipe for a double-layered chocolate cake, fit for any occasion.

Also, I must recommend trying the chocolate ganache topping described below. And the cream cheese filling is as easy as a bit of milk blended with cream cheese, or simply use fresh cream cheese if you can find it without adding any milk, mixed with your favourite sweet liquor- Bailey’s is always nice, but don’t use anything too rare or expensive like I made the mistake of using, because you won’t necessarily taste it in between the cake’s already flavourful layers.

In terms of the filling, what matters most is the type of fruit you use and the amount of creaminess in the middle. If you opt for fruit in the middle, then try using fruit that is high in acidity or sweetness such as kiwi, raspberries, dark pitted cherries (fresh or frozen), and mango. For an ‘in-season’ filling I’d recommend using the best local raspberries, preferably from a corner in your own backyard as these should have a much better flavour than often watery store-bought varieties, and try using generous slices of freshly picked, sun-ripened apricots or melon- absolutely the nectar of the gods- all lavishly surrounded by lashings of slightly sweetened whipped cream.

Hmm…well this has me thinking about summer already.  I’d better get out and enjoy the first sights and sounds of spring while there’s still a chance.

Chocolate ganache topping:

80 grams (more or less- this doesn’t have to be too accurate) of your favourite dark chocolate*

3/4 cup whipping cream, brought to the boil, and immediately poured over the chocolate. Stir until it makes a smooth chocolate sauce and pour over the top of the assembled cake, being sure to pour around the outer rim of the cake so that drizzles of chocolate run down the outside**.


* You could even try using half an organic, fair trade chocolate bar like Cocoa Camino Espresso chocolate mixed with half of a 70% Lindt dark chocolate bar for example, to easily achieve a rich, mocha flavour. Or you could try using other types of chocolate too, like milk chocolate, chilli-infused, tea-infused, orange chocolate etc…

** If you’d like to get even more decadent, maybe for a special occasion, then double the ganache recipe. Place the cake on a wire rack with a tray beneath to catch the run-off chocolate, and pour the topping all over the top. Cover the sides completely in chocolate with the help of a spatula. The cake will require refrigeration for a few hours until set.

February 22, 2010

(After Dinner) Nut & Ginger Chocolates


It's especially fun to learn new words when they concern my favourite subject- food.  In the case of these chocolate clusters they might be called, as the French say, mignardises; an after-dinner sweet typical in households and French restaurants alike – usually an elegant chocolate or delicate miniature pastry to accompany post-feast coffee or tea.  Mignardises, however small, do require some care and attention to detail; taking the time to do so may even transport your guests to a post-feast state of nirvana.

One might call these clusters mignardises, but in truth, although they’re quite cute, their easy-to-make nature does not quite befit the title.  The focus here is more on taste and texture than transporting people to other realms of being. 

Their crunchy, complex texture and energy-boosting quality makes these clusters an intriguing snack, and if offered to guests after dinner, can satisfy either a brief craving for chocolate, or a full-blown chocolate appetite if given the chance.

And, not to detract business away from local coffee shops, but they’re also small enough to keep in your purse for that panic-ridden time of emergency when you’re craving a little something sweet, but are faced with the giant, not to mention glutinous, coffee cakes and cinnamon buns on the other side of the sweet case.  I promise that despite it’s size, this subtle yet decadent treat will leave you feeling great…perhaps even a little naughty, and is best enjoyed mingling in the mouth with a meltingly hot drink.

Nut & Ginger Chocolates

3-4 pieces candied ginger
1 handful organic pumpkin seeds

100g (3.5 oz) dark chocolate at least 65% cocoa solids

Handful cashews (unroasted, unsalted)
Handful unsalted almonds or pistachios

Chop the ginger and pumpkin seeds together until very fine – this requires a few minutes of chopping but it’s worth it.  (I found my food processor couldn't get the pieces small enough, but if you have a small processor or grinder it just might work.)

In a heat-resistant bowl melt the chocolate – either in the oven or over a hot water bath.  When melted add the chopped ginger and pumpkin seed and stir thoroughly. Working quickly, add the cashews and, using your trusty fork, coat with the chocolate mixture.  Remove two or three cashews at a time and drop them carefully, so they hold together nicely, onto a silicone mat or baking sheet. Repeat with the almonds.  Sprinkle some cane sugar on top for a sparkly appearance and allow the clusters to cool until set.

February 13, 2010

Fragrant Rice Pudding with Rose Water and Earl Grey tea


I just finished watching the sappiest love film ever...and couldn't stop watching until the very end.  I've done the bad thing, and allowed myself to be consumed by the cheesy TV specials geared to warming everyone up for the big climax- the Valentine's weekend of l'amour.

And speaking of predictable...with Valentine's Day only a day away, one can hardly count the number of web and newspaper articles relating to chocolate.  I agree that really excellent chocolate tastes truly amazing; in fact I love chocolate and take it very seriously, but just like one's love for another, should it not be celebrated every day?

Amazing as it is, chocolate is not the only senses- arousing ingredient out there.  What about orange and rose water, saffron and tea, mint and honey, and the taste of a perfectly grown honeydew melon freshly picked in the morning sun?

Alright, now I might be dreaming of warmer days, but I do believe that my best friend chocolate well deserves to take the day off.

Now, perhaps it's because I've taken some time away from Asian and Indian cuisine that my past love of infusing food with teas such as jasmine and Earl Grey, and spices like fenugreek and mustard, has once more gallantly leapt to the fore of my attention.

For the last few days, I've been having a lot of fun playing with traditional Indian dishes and techniques, turning them into more modern, fresh, and (scary as this may sound) healthier meals.  I can't say it necessarily took much less time than creating traditional dishes, although I didn't go so far as to marinate or ferment anything for 24 hours, but the finished products tasted great, and made the most of the ingredients I had around me.  Dishes such as crêpes filled with south-Indian style turmeric potato and lentils topped with cumin-spiced Greek yoghurt, and lightly pickled cauliflower salad with cucumber and wild boar bacon bits, all made for an exciting return to Indian-style food, but this time using the classic recipes as a guide and not the rule.   

Inspired, I made a dessert that aroused the senses many more times than I believe the finest chocolate ever could.  So much so that I was quietly giggling at the table; luckily my boyfriend was equally enjoying it, or maybe he was just amused...  A simple rice pudding- who would have thought right?  But taken to the next level, infused with coconut milk and Earl Grey tea, cardamom and rose water, its perfumed essence was simply uplifting.

I recommend trying this, or something equally non-chocolaty, for something different this Valentine's Day.  Presented in a martini glass, topped with honey roasted nuts, or even a few organic red rose petals nestled on top, this exotic creamy pudding could likely transport you and your loved one to exactly the place where you want to be (wink, nudge, say no more!)

Earl Grey and Rose Water Rice Pudding

Big pinch (almost 1 tbsp) of Earl Grey tea leaves – put inside a square of muslin/cheesecloth and tie tight
1/8 cup cane sugar
1/2 a cap-full of rose water
1/4 tsp ground cardamom (from whole pods it will be almost 1/2 tsp once ground: smash open 3 green cardamom pods and remove the seeds- grind in a mortar and pestle until fine)
1.5 cups milk plus 1/4 cup coconut milk (optional- add extra milk if omitting coconut milk)

1/2 cup Basmati rice, cooked in 1 cup water (if you'd like it even creamier then use Arborio short-grain rice)

Bring the rice to a boil, cover with lid, and lower heat to just above minimum and cook for 10 minutes or until water has evaporated.

About 5 minutes into the rice cooking, place everything else in a small pot and bring to a boil.  Then remove the lid, add the cooked rice to the milk and reduce the temperature to medium heat- just high enough to keep the milk and rice at a low boil.  After about 7 minutes, reduce heat once more to medium low and cook for another 3 minutes.  Remove the bag of tea and stir to release some of the heat.  I suggest serving this fragrant rice pudding in small bowls, or alternatively, allow the pudding to cool a little and pour into clear serving glasses.  Garnish with rose petals, honey-roasted nuts, or dried rose hips and cardamom.

Enjoy and Happy Valentine's!

January 24, 2010

Easy Buckwheat Pancakes

Here's a little something for your weekend breakfasts and brunches. If you're anything like me, and turn into a 5 year old on Saturday mornings wishing to be awoken by the smell of pancakes on the griddle, then you'll appreciate the fastest gluten-free pancake recipe I've yet to come up with. This is immediately satisfying and won't take you the whole morning to make.

Serves 2- double or triple the recipe as needed.

In this order whisk together:
1 egg-preferably free range organic
1/3 cup milk
1 tablespoon neutral-flavour oil (canola/sunflower/safflower)

1/4 cup buckwheat flour, sifted
1/4 cup corn starch
2 teaspoons baking powder

Be sure to add the baking powder right at the end as it works best if not beaten too much. Bring a pan to medium heat and in it melt equal quantities of butter and oil. Wait until a little water flecked on the pan makes a sizzling sound, then add your batter.

Serve with whichever toppings you most enjoy- I recommend butter or yoghurt with some fresh fruit and several different syrups. Saskatoon berry or boysenberry syrup is incredibly good, and then of course, there's always the trusty maple.

Enjoy!

January 7, 2010

It's Time for English Custard

Where to start? Where to begin?!

Firstly with a hope that everyones' holidays were filled with the love and laughter that sometimes you can only experience with the closest of friends and family...with the help of some seam-splittingly rich foods of course! 

I have to say that, on reflection, the best moments of the holiday season for me were honestly the simplest and the most rustic.  Assuredly, the few culinary achievements I was able to pull-off were much enjoyed, and at their best they had me drooling on my plate...but even the simple meals, like nachos "with the works" after a long day of skiing, found us delighting in their easy-bake nature and instantly filling qualities, as we played board games and sipped thick, Euro-style hot chocolates opposite the flickering log fire.

That said, without fault, every Christmas our family's combined multicultural experiences find their way into our meal planning (yes, we actually create entire menus just to give a sense...).  Steamed Christmas puddings shipped straight to our home from England, different takes on Mexican molé inspired by my sister's time in Mexico, my Uncle's version of a type of Chinese soup using varieties of seaweed and fungi found only in the deepest, darkest sections of the one (decent) Asian shop in town, platters of Italian antipasti, and French-inspired wintery sides of caramelised chicons or Belgian endives; not to mention the plethora of goodies on the silver goodie tray.

Now that the days of 'goodie-rading' have past, and helped along by the Okanagan's mild winter this year, my mind is already drifting ahead to warmer days, when the ice is melted, when the kitchen potager is no longer covered in snow, and when the days of sowing the first of the seasons' seeds begin, with early crisp lettuces and radishes only a few weeks away. 

But enough of that dreaming....we must be practical! To keep you from going into a serious sugar-withdrawal coma I'll leave you with my favourite recipe for the richest (well...almost) English custard I dare present you with right after Christmas. It's perfect for drizzling over lightly cooked chunks of spiced apple or pear (at it turns out nutmeg goes extremely well with custard), or whichever fruit you may have on hand; my advice though is to steer clear of citrus fruit.  As tempting as the new arrivals of blood oranges may be they may just curdle your custard.

Vanilla Bean English Custard...or Crème Anglaise if you'd like it to sound even better*

1 + 1/8th cup whipping cream
1/2 a vanilla bean, halved lengthwise to reveal the seeds
1 + 1/8th cup 1% or semi skimmed milk
4 egg yolks
(just over) 1/2 cup granulated/caster sugar or organic cane sugar

Heat the milk and cream with the vanilla pod halves until heated through.  Whisk together the sugar and egg yolks in a bowl that ideally has a pour spout.  Add the heated milk to the egg mixture (keep the pot at hand) whisking until completely combined then return to the stove top.

Stir constantly on low heat (about 10 minutes of attention required but it's well worth it) until the custard thickens.  Now this is where some patience is required...you must not leave the pot's side for more than a few seconds otherwise the eggs will scramble and it will ruin the custard.

You'll know the custard is done when it coats the bottom of the pot; just tip the pot to reveal the bottom and, with a wooden spoon, draw a line through the custard- if it reveals the bottom of the pan then it's ready!

Enjoy

*Now, take this moment to find, and then release with abandon, the Bird's custard tins or any other type of instant custard alternative hiding in the back of your cupboards.  I'm not sure how, but in Canada we seem to have forgotten the beauty of truly home-made, from scratch, traditional custard. In fact, this is one of the few good things to have come out of England (sorry guys).  It's so good, that the French have given due respect to its neighbour's efforts by calling it crème anglaise to this very day.  Few things can compare to this custard's creamy, vanilla-infused richness, and ribbon-like texture.  Especially not the 19th century powdery substitute whose only raison d'être is to replace eggs as the traditional thickening agent.  Of course this is a great alternative if you happen to be allergic to eggs but in no other case should a custard substitute be used...except for maybe in Nanaimo bars...where no other icing will do.